Are you tired of spending countless hours maintaining your natural lawn? Artificial grass might be the perfect solution for you! By installing artificial grass, you can enjoy a lush, green lawn without the hassle of constant upkeep. In this guide we’ll walk you through how to install artificial grass covering everything from site prep to finishing edges, allowing you to transform your lawn into a maintenance free oasis.
Quick Overview of Artificial Turf Installation
Prepare your lawn for artificial grass installation by measuring the area, selecting turf and gathering the necessary tools and materials.
Remove existing grass and soil before laying a weed barrier and base material with 1/4” slope per foot towards runoff point.
Secure turf pieces, spread infill material and groom regularly to ensure the longevity of artificial lawn.
Table of Contents
Preparing for Artificial Grass Installation

Proper preparation of the area is key to getting the best results of your installation. This includes measuring the area, choosing the right artificial grass, and gathering all necessary tools and materials. Investing time in preparation paves the way for a seamless and successful artificial grass installation.
Measuring the Area
The first step in preparing for artificial grass installation is accurately measuring your lawn area. Here’s how to do it:
Use tools like a tape measure or measuring wheel to measure the length and width of the area where you plan to install the turf.
If you’re dealing with an uneven space, consider landscaping it to create an even plane for the artificial grass.
Round up to the nearest foot, and double-check measurements for accuracy.
Draw a scaled image of your garden on graph paper to help visualize the layout, and calculate the total square footage needed.
Bear in mind, accuracy in measurements is pivotal in procuring just the right amount of artificial grass for your project.
After you’ve measured your lawn area, use the total square footage to determine the amount of artificial grass required for your project. Consider the cost per square foot when purchasing the artificial grass. To calculate the square foot needed, multiply the length by the width of the area, and add an additional 10% to account for waste and cutting. This will ensure you have enough turf to cover your entire lawn without any gaps or shortages.
Choosing the Right Artificial Grass
The success of your project hinges on the selection of suitable artificial grass. The right grass depends on factors such as:
Expected use
Material
Pile height
Durability
For example, if you have a high-traffic area or pets, you’ll want a more durable grass with a two-to-three-inch pile height. Additionally, the cost of artificial turf varies depending on the material, with options like polypropylene, polyethylene, and nylon available. Keep in mind that professional installation costs will also factor into your overall budget.
When choosing artificial grass, consider the appearance and feel of the synthetic turf as well. High-quality synthetic grass should closely resemble natural grass in both color and texture. Also, make sure to check if the installer offers a warranty to cover workmanship. A meticulous selection of artificial grass guarantees a beautiful and durable lawn.
Gathering Tools and Materials
The next step is to choose the right artificial grass, tools, and materials to install. To do this you’ll need:
A spade or sod cutter to remove existing grass and soil
Sharp sand or silica sand for base preparation
A woven or non-woven polypropylene weed barrier to prevent weed growth beneath the turf
Landscaping staples or U-shaped galvanized staples to secure the artificial grass
If you don’t already own these tools and materials, you can purchase them at a local home improvement store or rent them from a tool rental center. Having all the prerequisites at the beginning of the project streamlines the artificial grass installation process, saving you both time and frustration.
Removing Existing Grass and Preparing Soil
Before laying your new artificial grass, you’ll need to:
Remove the existing natural grass and soil from your lawn. This critical step ensures a stable and level foundation for the artificial turf.
Kill or remove natural grass.
Clear debris from the area.
Prepare the ground for turf installation.
Killing or Removing Natural Grass
There are several methods for eliminating natural grass, including physical removal, solarization, and the use of herbicides. Solarization is a safe and eco-friendly option that involves covering the grass with black plastic and allowing the sun to bake it. To perform solarization, you’ll need plastic sheeting, duct tape, and soil. Follow the steps outlined in the knowledge base to effectively kill natural grass using solarization.
Alternatively, you can manually remove the grass using a sod cutter, shovel, or hoe. Keep in mind that this method requires more physical labor and may take longer to complete. Regardless of the method you choose, it’s important to effectively eliminate the natural grass to create a stable foundation for your artificial turf.
Preparing the Ground
After removing the natural grass, it’s time to prepare the ground for artificial turf installation. First, remove at least four inches of topsoil to create a stable surface for your artificial grass. Use a sod cutter, hoe, or shovel to remove the top three to four inches of topsoil from the installation area. Ensure that all vegetation within this layer is completely removed before proceeding.
Next, level the ground and remove any debris such as rocks or roots.
Lay a sub-base on top of the soil to create a soft and even surface for the turf installation.
A class II road base is the best and most effective option for this purpose.
Make sure to create a slope of at least 1/4-inch per foot towards a runoff point to ensure proper drainage.
A proper groundwork preparation assures a stable foundation for your artificial turf.
Laying Base Material for Artificial Turf
Once the ground is prepared, it’s time to lay the base material for your artificial turf. The right base material is crucial for drainage and stability, ensuring a long-lasting and beautiful lawn.
In this section, we’ll discuss selecting and installing the appropriate base material for your artificial grass project.
Selecting the Right Base Material
Selecting the right base material for your artificial turf is essential for proper drainage and stability. Common choices include:
Decomposed granite
Crushed miscellaneous base (CMB)
Class II road base
Pea gravel base
It’s crucial to consider factors such as cost, availability, and the specific requirements of your lawn when choosing a base material.
Decomposed granite is a popular choice due to its gravel structure, which breaks down easily and conforms to the ground’s structure. Other options, such as class II road base, offer a cost-effective and long-lasting foundation for artificial turf installations. Ultimately, the right base material for your project will depend on your unique needs and preferences.
Installing the Base Material
After selecting the appropriate base material, it’s time to install it in your prepared ground. The recommended depth for the base material under artificial turf varies depending on the location and specific requirements but generally starts at a minimum depth of 2 inches of class II road base. In areas with severe winters, a depth of 6-8 inches may be necessary for added stability.
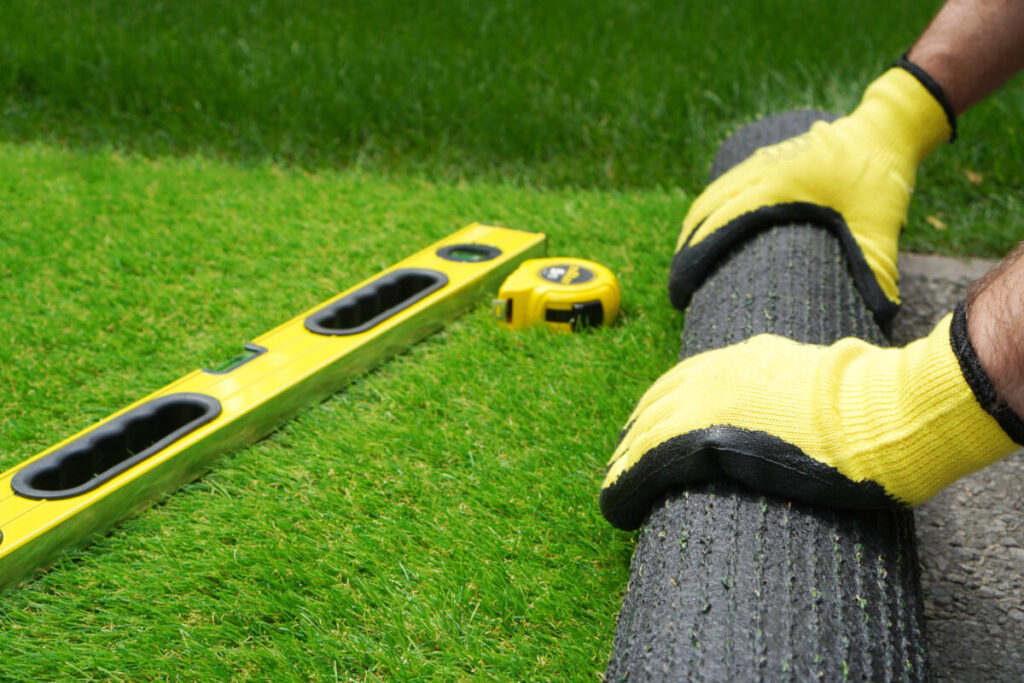
When installing the base material, ensure that it has a minimum slope of 1/4-inch per foot towards a runoff point for proper drainage. Use a level or a laser level to measure the slope and adjust as needed. A correct installation of the base material secures a stable and well-drained foundation for your artificial turf.
Installing Weed Barrier and Artificial Grass
With the base material in place, you’re ready to install the weed barrier and roll out your artificial grass. The weed barrier prevents unwanted growth beneath your turf, while the artificial grass creates a lush, low-maintenance lawn. This section will navigate you through the installation of the weed barrier and the rolling out of the artificial grass to achieve a smooth, even surface.
Laying Weed Barrier
The first step in installing your artificial grass is laying the weed barrier. Here’s how to do it:
Choose a woven geo-textile fabric as the most suitable weed barrier for artificial grass installation.
Unroll the weed barrier over the base material, making sure to overlap the edges by at least 6 inches for proper coverage.
Use landscaping staples every three or four feet to secure the weed barrier in place.
Before moving on to the next step, inspect the weed barrier for any gaps or overlaps. If you find any, fill them in or reinforce them with extra staples to ensure that your artificial grass remains weed-free and low-maintenance.
Rolling Out Artificial Grass
Now that the weed barrier is in place and you’ve decided on the type of artificial grass to install, it’s time to roll out your new turf. Start by unrolling the turf over the weed barrier, ensuring that the turf blades are bending towards your home for the most natural look. If you have multiple rolls of turf, stagger the end seams so that they’re not aligned in a row.
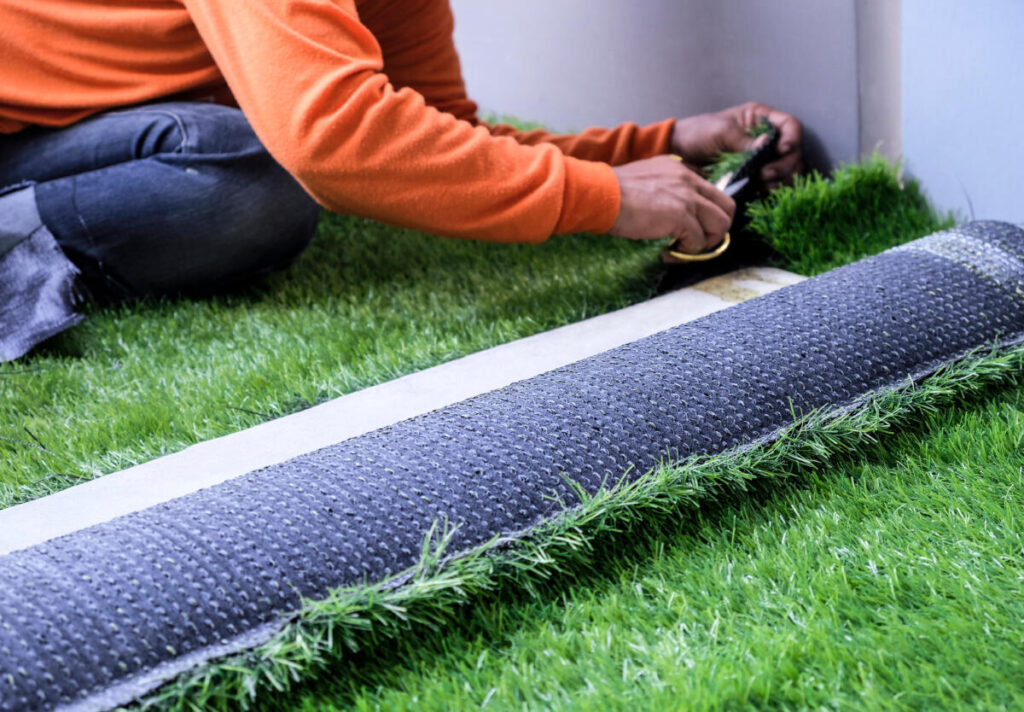
Once the grass is rolled out, use a sharp utility knife to trim the edges of the turf, leaving a few extra inches along the edges to ensure a proper fit. Remember to use cut-resistant gloves and take your time while cutting to avoid damaging the turf. With the artificial grass rolled out and trimmed, you’re ready to secure and join the turf pieces.
Securing and Joining Artificial Turf Pieces
With your artificial grass rolled out, it’s time to secure and join the turf pieces. Properly securing and joining the turf ensures a seamless and stable lawn that looks and feels like natural grass.
In this section, we’ll discuss nailing down the artificial grass and joining the seams with jointing tape and adhesive for a professional finish.
Nailing Down Artificial Grass
To secure your artificial grass, follow these steps:
Use bright common nails or non-galvanized nails spaced approximately 4 inches apart around the perimeter and seams, and about 1 inch from the edge.
Nail the turf at intervals of 18 inches to 2 feet in the middle of the lawn.
When nailing the grass, spread the blades away from the base of the nail to prevent any blades from being trapped or damaged.
Securing the artificial grass properly with nails guarantees its stability and shape retention over time. This step is crucial for the longevity and appearance of your artificial lawn.
Joining Turf Pieces
To join your artificial turf pieces, follow these steps:
Trim the edges of the turf as needed, using a utility knife.
Lay jointing tape underneath the area where the seam will be, with the shiny side down.
Apply artificial turf adhesive to the jointing tape.
Carefully place one side of the turf onto the tape, ensuring a gap of 2-3mm between the sections.
Slowly press the turf down onto the tape, applying even pressure along the length of the join.
Check the seams every 0.5 meters to ensure they remain secure during the installation process.
Joining your turf pieces adeptly in the same direction yields a seamless, professional-looking natural lawn that echoes the aesthetics of natural grass lawns.
Infilling and Finishing Touches

The final step in your artificial grass installation is infilling and adding the finishing touches. In this section, we’ll discuss spreading infill material evenly across the lawn and grooming the artificial grass for a polished and natural appearance.
Spreading Infill Material
Infill material, also known as turf infill, adds weight to your artificial grass and provides cushioning for the turf blades. To spread infill material evenly across your lawn, use a drop spreader, power broom, or Grandi Groom. Common infill materials include sand, rubber, and silica sand. Using a spreader, evenly distribute the infill material across your lawn, ensuring proper coverage.
An even application of infill material is vital for ideal weight distribution and blade support. This helps prevent uneven wear and tear and ensures a long-lasting and attractive artificial lawn.
Grooming the Artificial Lawn
After spreading the infill material, groom your artificial lawn to give it a polished and natural look. Using a stiff-bristled broom, fluff up the turf blades, ensuring they stand upright. Additionally, hose down your lawn to remove any excess sand or debris.
Maintaining the aesthetics and functionality of your artificial grass necessitates regular grooming. By fluffing up the turf blades and keeping the lawn clean, you can extend the life of your artificial grass and enjoy a beautiful, low-maintenance lawn for years to come.
Getting the Most Out of Your Artificial Turf
Installing artificial grass can transform your lawn into a beautiful low-maintenance oasis. Hopefully this guide can help you nail the artificial grass installation process your first try. With the proper tools, materials, and knowledge, you can turn your lawn into a stunning and functional space that requires minimal upkeep and offers a lush, green appearance year-round.
If you’re starting to think DIY artificial turf installation is a bit too much for you, it might be time to bring in the professionals. At Three Timbers, artificial turf is one of our specialties. Whether you’re looking for a small patch of turf to take care of your pets, or a massive backyard putting green, our team has the skills and expertise to get the job done right. Contact us today to learn more!
Frequently Asked Questions
What do you put underneath artificial grass?
For the best artificial grass installation, a weed barrier fabric should be installed beneath the turf and overlapped to secure it with 20D nails or landscape staples. Additionally, rocks ranging from three-eighths to three-fourths of an inch, such as crushed or decomposed granite, are ideal for the sub-base layer. For professional installations, Class II Road Base is recommended.
How do you prepare ground for artificial grass?
To prepare ground for artificial grass, first excavate the area and compact the soil. Then, add a four to six inch layer of three-quarter crush and rake it out evenly to your desired grade. Finally, give the project area a thorough soaking.
Can I just lay artificial grass on soil?
For best results, you must remove all organic matter and lay a base before installing artificial turf on soil. Laying artificial grass directly on leveled (or shaped) top of soil is a much better option than trying to put it over existing grass. Laying directly on grass can lead to a lumpy and uneven turf within a few months of installation.
How do I choose the right artificial grass for my lawn?
When selecting artificial grass, consider expected use, material, pile height, and durability to ensure the right choice for your lawn. Take into account specific needs, like high traffic or pet use, to get the most from your new lawn.