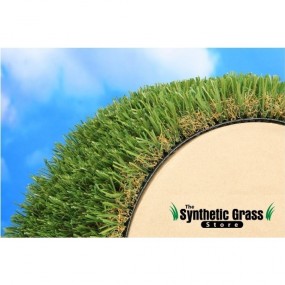
How to install artificial turf.

Here are some tips and tricks you can use to install artificial turf.

Cost Comparison of Real Grass Vs. Artificial Grass

Comparison made over a 15 year sample size.

Cost of Real Grass

  • Demo/Site Prep $1,060.00

    Eliminate 3"-4" of topsoil, rock, old sod, and weeds.

  • 1,000 SQFT Sod Install $2,250.00

    Midiron sod, sod mix, delivery, install

  • Irrigation $750.00

    $500 to $1,000 for an additional zone of irrigation

  • Maintenance $15,300.00

    $85.00/month for watering, mowing, weed control, fertilizer, and re-seeding. We then multiple that $85.00 by 180 months, representing 15 years of maintenance.

$ 0
Real Grass Cost Over 15 Years
$ 19.36
Real Grass Cost Per SQFT Over 10 Years

vs.

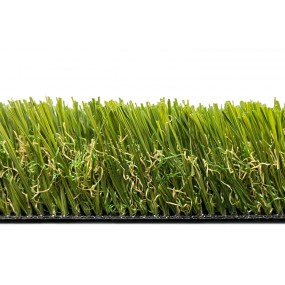
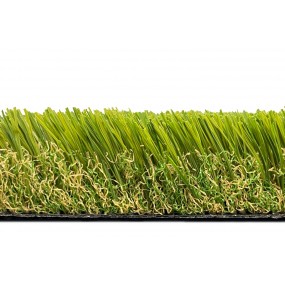
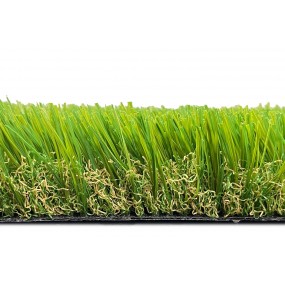
Cost of Artificial Grass

  • Demo/Site Prep $2,750.00

    Eliminate 5" of topsoil, rock, old sod, and weeds.

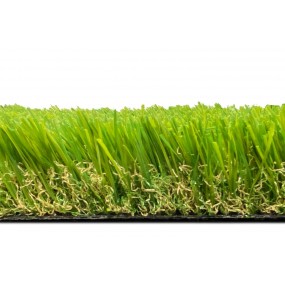
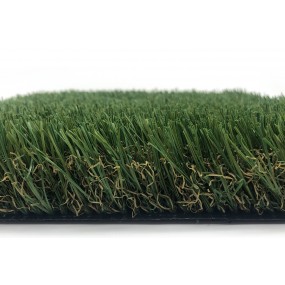
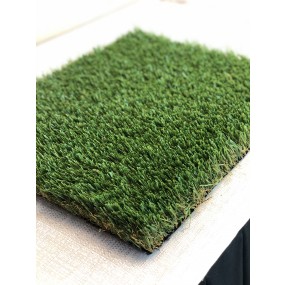
  • 1,000 SQFT of Turf $8,500.00

    Artificial Turf, 1/4" Minus Base, Silica Sand, Weed Fabric, Nail Fasteners, Install

  • Maintenance $1,800.00

    $10.00/month for cleaning it off each month. We then multiple that $10.00 by 180 months, representing 15 years of maintenance.

$ 0
Artificial Grass Cost Over 15 Years
$ 13.05
Artificial Grass Cost Per SQFT Over 15 Years

Artificial Turf Install

artificial turf illustration

You’ve seen artificial turf on sports fields, commercial property, and even your neighbors backyard, but what is artificial turf and how do you install it.


This step-by-step guide will help you install your own synthetic grass for a lush year round lawn. But before getting into the install details let’s quickly discuss what synthetic grass is:


Synthetic grass is full of synthetic fibers designed to mimic grass blades that are green with varying blade heights. Synthetic grass is constructed in the same way carpet is made, with a solid backing. Most new artificial turf created today also weaves in smaller brown strands, mimicking thatch or dead grass that you would see in a real lawn. Artificial turf is making leaps and bounds every year, looking more and more real… as long as it’s installed correctly.

  • Waste Factor On Projects 20 %
  • Minimum Aggregate Base 2.5 "
  • Nail Size 3-6 "

Materials

  • Seaming Tape
  • Nails
  • Framing Board (optional)
  • Plastic Stakes (optional)
  • Filter Fabric/Weed Barrier
  • Silica Material
  • Shovel
  • Trowel
  • Plate Compactor
  • Hand Tamper
  • Power Broom
  • Sod Cutter

Instructions

  1. We recommend sketching out your area and taking good measurements. Take measurements based on product being directional. You can also email it to us.
  2. When starting your turf project the area needs to be 2 1/2" - 4 1/2" below grade, and free of any existing root and organic base. When an existing lawn is present (even if it is dead or dormant) it is necessary that you remove at least 2 1/2" of the existing grass using a sod kicker, sod cutter, mini skid or skid steer.
  3. The reason the turf area needs to be 2 1/2" - 4 1/2" below grade is because turf NEEDS a solid sub base. The sub base gives the turf a solid foundation while providing proper drainage. If you live in a more arid climate, you can get away with installing a 2" base under your turf; BUT if you are in a colder climate we recommend a base of 4" (we personally over build and lay 6" bases).
  4. Once your hole is prepped, spread aggregate over the installation area to create your sub base for the synthetic grass. Use an asphalt or landscape rake to spread aggregate evently and level your base
  5. Once your base is level, dampen the entire area, and compact the area using a hand tamper or plate compactor. When complete, the sub base should be a hard, smooth surface for the turf to lie over. Common sub base materials are 1/4 minus, crushed limestone with fines, or decomposed granite. Approximately 1 ton per 100 square feet is average for a 2" base (check out our rock section for more information).
  6. Spreading aggregate over the installation area is the first step in creating your sub base for synthetic grass. It is recommended the base be at least 2” deep. Use an asphalt or landscape rake to spread aggregate evenly and level your base. Dampen the entire area. Compact the area using a hand tamper or plate compactor. When complete, the sub base should be a hard, smooth surface for the turf to lie over. The sub base gives the turf a solid foundation while providing proper drainage. Common sub base materials are 1⁄4 minus, or decomposed granite. Approximately 1 ton per 100 square feet is average. If your area is low more base maybe required.
  7. We recommend laying a commercial grade weed fabric over your base to keep weeds or grass from growing through your artificial turf. Roll the weed fabric over the sub base and secure it with a few nails. Be sure to overlap your fabric by 6"-12".
  8. Now that your sub base is complete, it is time to start laying your turf. A quick note about turf: Turf is manufactured with an extra couple of inches of backing material. This extra material runs the length of the turf roll on both sides after the last stitching row of grass. Before you can seam two pieces of turf, you will need to remove the extra material. You can trim the extra material by flipping the turf over, finding the second row of stitching and cutting between the second and third stitch row with a utility knife. Cut down the entire stich row, frequently replacing your blade when it becomes dull.
  9. When turf is manufactured, an extra couple of inches of backing material remains along the edge of the turf. This extension runs the length of the turf roll on both sides after the last stitching row of yarn. Before you can seam two pieces of turf together you must remove the extra material. To trim the excess material, flip the turf over and work from the backside. Find the second row of stitching and start cutting between the second and third stitch row with a carpet knife. When your knife becomes dull, replace or rotate the blades to keep your cuts neat. – Do not cut turf from the top as it will sever the grass blades.
  10. Roll the turf over your base. Be sure to roll out the turf in the same direction each time, as artificial grass does lay in the same direction. Once the turf is rolled out, rough cut the outside edges of the turf shape, leaving a little extra for positioning it.
  11. Once the turf is in position, trim off any extra turf around the edges to get a clean fit.
  12. After the turf is cut and in the right position, use nails to secure the turf. Use nails that are 3"-6" in length to secure the grass to your base. It is recommended that you use electo galvanized or steal nails, mainly because you actually want them to rust, allowing them to expand for extra security. Nailing note: Add nails every 3"-4" around the perimeter, while also adding nails roughly every 3' in a grid like pattern throughout the interior area.
  13. If your turf install requires a seam, check and double-check the fit of the two sections making sure there is no overlap. Alternate nails down the seam in a zigzag formation every 1"-2" along the entire seam or use seaming tape if that makes you feel more comfortable.
  14. Lastly, use a drop spreader to evenly disperse silica sand infill into the turf fibers. Each turf requires a different amount of silica sand, but it is common to lay 1-2 pounds of silica sand per square foot. Fill your spreader with sand, and then walk throughout your turf install, dropping the sand evenly across the entire area.The use a stiff bristled broom or power broom to rake the sand deep into the thatch.

We partner with The Synthetic Grass Store

Unfortunately, not all turf is made of equal quality… A whole lot of people have learned that the hard way! That’s why we partner with The Synthetic Grass Store for all of our Artificial Turf installs. Check out their products in person at any of their many Arizona locations.

Kentucky Blue 60 Pro

$3.07/SQFT

(Prices are apt to change at Three Timbers discretion)

Pebble Creek 80

$2.73/SQFT

(Prices are apt to change at Three Timbers discretion)

Pebble Creek 60

$2.32/SQFT

(Prices are apt to change at Three Timbers discretion)

Green Valley 80

$2.73/SQFT

(Prices are apt to change at Three Timbers discretion)

Green Valley 60

$3.07/SQFT

(Prices are apt to change at Three Timbers discretion)

Armadura 73

$5.14/SQFT

(Prices are apt to change at Three Timbers discretion)

Kool K9

$4.39/SQFT

(Prices are apt to change at Three Timbers discretion)

Denali 80

$4.10/SQFT

(Prices are apt to change at Three Timbers discretion)

Request a Quote

Fill out the form below and a Three Timbers representative will contact you shortly.

[forminator_form id="2826"]